Engineering
Signing my PDFs : a mini-CA anchored on PGP, run from Tails
How I sign my quotes, invoices and CV without Adobe or a paid certificate authority. A PGP key as the anchor, an X.509 root CA that only lives on an encrypted stick in Tails, a yearly signing certificate, a revocation list, timestamped signatures with pyHanko and a verifier on this site. Every Tails step, mistakes included.
- engineering
Why sign a PDF ?
What is a PDF sent by email worth ? Honestly, not much. Since I started freelancing I send a lot of them: quotes, invoices, my CV, sometimes a contract. Anyone can open one in an editor, change a price or a date, and forward it. And pasting a picture of my handwritten signature at the bottom changes nothing, a picture can be copied too.
A real digital signature fixes that. The reader can check that the file comes from me, and that not a single byte changed since I signed it. The question is how to get one.
Paid certificate (Adobe’s trusted list)
- Pros : Acrobat shows the green check straight away.
- Cons : a yearly subscription, often a hardware token shipped to you, and the whole trust is rented from a company.
Self-signed certificate
- Pros : free, five minutes with openssl.
- Cons : nobody can tell it’s really mine, and if my laptop gets stolen there is no way to cancel it.
PGP signature next to the PDF (cv.pdf.asc)
- Pros : strong, and my PGP key is already public.
- Cons : the PDF reader shows nothing, and apart from a few geeks nobody will
ever check a
.ascfile.
So I took a bit of each. A small certificate authority of my own (a “mini-CA”) whose root is vouched for by my PGP key, real PDF signatures that any reader understands, and a page on this website that checks the whole chain in your browser. Cost: 0 €, apart from a few USB sticks.
Disclaimer : I am not a security professional, and this is not a qualified electronic signature (eIDAS or anything like that). It proves one thing: the file comes from me and hasn’t been modified. Your PDF reader will also say the signer’s identity is “unknown”, because my root isn’t on Adobe’s list. That’s exactly what the verification page is for.
The chain of trust
Before diving into the steps, it is nice to recall how the pieces hold together. Since I live in Japan, the easiest comparison is the hanko (判子), the personal seal:
- The jitsuin (実印) is your registered seal. It stays in a drawer and only comes out for big things, like buying a car. That’s my root CA: it stays offline and comes out once a year.
- The mitomein (認印) is the everyday seal, the one for parcels. That’s my signing certificate: it lives on the laptop and signs every PDF, but it’s replaced every year and can be cancelled.
- The city hall registration that proves the jitsuin is yours is my PGP key. It’s published in several places, so you can check its fingerprint somewhere other than my website.
(And the Python tool that does the signing is called pyHanko. I don’t think it’s a coincidence ^^)
In technical terms:
PGP key 7526 0AC4 B55D 0A91 A079  760C BE7E 6798 D983 5EA6
  │  primary key offline, [S] subkey on the laptop
  └─ clearsigns the SHA-512 of the certificates → /gpg/x509.cert.sha512.asc

root CA  (RSA-4096, 10 years, only on a LUKS stick, only in Tails)
  ├─ issues ──▶ signing certificate  (RSA-4096, 400 days, on the laptop)
  │               └─ signs the PDFs  (PAdES + RFC 3161 timestamp)
  └─ signs ───▶ root.crl  (revocation list, 400 days, served at /gpg/root.crl)
Two more pieces:
- The CRL (certificate revocation list) is the “cancelled” list, signed by the root. Every signing certificate carries its address, so a verifier knows where to look.
- The timestamp comes from DigiCert’s free public timestamp server (RFC 3161). It proves when a PDF was signed. That matters a lot: the verifier checks the certificate at the time of the timestamp, not today. So a PDF signed in 2026 stays valid after its certificate expires, and someone who steals my key in 2027 can’t pretend they signed something in 2026.
What you need
- A Tails USB stick. Tails is a Linux that boots from a stick and forgets everything at shutdown. Here it never connects to any network.
- A CA stick, encrypted with LUKS, that only ever goes into Tails. It holds the root key.
- A transfer stick, plain, with a folder named
pdf-ca-transferat its root. It only carries public data between the laptop and Tails. - A backup stick (LUKS too), for a safe place far from the laptop.
- On the laptop:
openssl,gpgand pyHanko. In Tails: nothing to install,bash,opensslandgpgare already there.
All the scripts live in scripts/pki/ in this site’s repository, and the Tails
part in scripts/pki/offline/.
Why two sticks ?
My first version had a single stick. The laptop wrote the signing requests
directly into the CA folder and read the results back from it. It worked, but
look at what it means: every year, the root key (encrypted, fine), the CA
database and the scripts that Tails runs with the root passphrase were
mounted on a computer connected to the internet. A malware on the laptop would
only have to edit session.sh so it copies the decrypted key onto the stick,
and wait for the next year. The whole point of Tails is gone.
So now the rule is simple: the CA stick never goes into the laptop. Everything travels on the transfer stick, in three folders:
requests/: laptop → Tails, the signing requestsresults/: Tails → laptop, the root certificate, the CRL and the issued certificatesupdate/: laptop → Tails, new versions of the scripts, signed with my PGP key
And the scripts check it for me. The laptop ones refuse to run while a CA folder is mounted. The Tails ones refuse to run with a network connection, or when the transfer folder sits on the CA stick itself.
Step by step : the Tails sessions
Step 0, on the laptop
Two commands, with only the transfer stick plugged in:
scripts/pki/pack-offline.sh      # PGP-signed scripts → update/
scripts/pki/new-signing-key.sh   # signing key + request → requests/
new-signing-key.sh asks for the passphrase of the signing key (the one I type
for every PDF) and prints the sha256 of the public key. Write it down or
take a picture of it: Tails will show it again, and the two must match.
Step 1, boot Tails
- On the Welcome Screen, pick the keyboard layout you will type the passphrase with. A passphrase typed on the wrong layout is simply a wrong passphrase.
- Don’t connect to any network. Not even once.
- Plug both sticks in. The first time, format the CA stick in Disks and tick the password protection (LUKS). Then unlock it in Files.
Step 2, check the scripts before running them
The scripts come from the laptop, which is online. So before running anything with the root passphrase, Tails checks that they are really signed by my PGP key. The very first time this check is done by hand, because there is no trusted copy on the CA stick yet:
cd /media/amnesia/<transfer label>/pdf-ca-transfer/update
gpg --import pgp.asc
gpg --decrypt SHA512SUMS.asc > /tmp/SUMS   # must say "Good signature"
sha512sum -c /tmp/SUMS                     # every line: OK
mkdir -p /media/amnesia/<CA label>/pdf-ca
INSTALL_TO=/media/amnesia/<CA label>/pdf-ca bash update.sh
Take your time on this step. The fingerprint gpg prints must be
7526 0AC4 B55D 0A91 A079 760C BE7E 6798 D983 5EA6, checked against a copy you
trust: paper, your phone, keys.openpgp.org seen from another device. Not against
the stick, of course. After that, update.sh lives on the CA stick and does
this check by itself, with the fingerprint pinned in _lib.sh.
Step 3, create the root CA (once in ten years)
bash /media/amnesia/<CA label>/pdf-ca/init-root.shIt checks there is no network, finds the transfer stick, shows the clock, then asks for a new root passphrase (12 characters minimum, mine lives in KeePassXC). Then it creates:
- an RSA-4096 key, encrypted with AES-256
- a self-signed certificate valid 10 years, that can only sign certificates
and CRLs, and only one level below it (
pathlen:0) - a first CRL, and a copy of everything public in
results/
It ends with the SHA-256 fingerprint of the root. Write it down too:
publish.sh prints it on the laptop, and they must match.
Step 4, the yearly session
bash /media/amnesia/<CA label>/pdf-ca/session.shThis is the only command to run in Tails every year:
- it asks once for the root passphrase
- for each request on the transfer stick, it shows the subject and the
sha256 of the public key. Compare it with what the laptop printed in
step 0, and only then answer
y - it issues a 400-day signing certificate. Whatever the request says, the
script forces the name and email, and gives the certificate the right
purposes (
digitalSignature,nonRepudiation, document signing) and the address of the CRL - it re-signs the CRL for 400 more days and rewrites
results/
Why 400 days ? One session a year renews both the certificate and the CRL, with about five weeks of slack if I’m late.
Step 5, the backup (“the stone”)
Right after init-root.sh, copy pdf-ca/ onto the backup stick, together with
the PGP primary key and its revocation certificate. Not the root passphrase,
that one lives somewhere else. Then the stick goes to a safe place and nobody
touches it for ten years.
Why only once ? Because the only irreplaceable thing is the root key, and it never changes. Everything that changes every year (issued certificates, revocations) is public, so it’s on the transfer stick and in the git history of this site. My first version needed a fresh backup after every session, which nobody does in real life. Now:
- serials are random, so an old copy can’t issue a serial that is already out there
- CRL numbers come from the date, so they never go backwards
session.shfirst readsresults/and adds any certificate or revocation the CA folder is missing
So restoring a three-year-old copy just works.
Step 6, back on the laptop
Shut Tails down, and plug only the transfer stick into the laptop:
scripts/pki/publish.sh
git add public/gpg && git commit && git push
publish.sh checks that the root is the same as the one already published (a
different root means the wrong stick, or tampering), that the CRL and the
certificates chain to it, then writes public/gpg/: my PGP public key, the root
and signing certificates, the CRL, and x509.cert.sha512.asc, the SHA-512 of
the certificates clearsigned with my PGP key. That last file is the bridge
between PGP and X.509. Cloudflare rebuilds the site and it’s live.
Signing a PDF
The everyday part, finally ! pyHanko is an open source Python tool for PDF signatures. Its command line is a separate package, and the image support is an extra you have to add by hand (that one cost me two commits):
pipx install pyhanko-cli
pipx runpip pyhanko-cli install 'pyhanko[image-support]'
scripts/pki/set-signature-image.sh sig.png   # once
scripts/pki/sign-pdf.sh cv.pdf # → cv.signed.pdfset-signature-image.shtrims my handwritten signature and stores it encrypted to my PGP key (signature.png.asc), so it can sit in the repository. It’s only decrypted into a private temporary folder while signing.sign-pdf.shlists the empty signature fields of the PDF (the “sign here” box of a form) and asks which one to use. The box shows my handwritten signature with “Signed by… / date / Verify at eymeric.me/gpg”. That last line is a clickable link, added before signing so the signature covers it too.- Expect two prompts: the PGP passphrase (to decrypt the picture), then the signing key one.
- The signature is PAdES, with a timestamp from DigiCert’s server.
Where does the empty field come from ? My quotes and invoices are made with my
own Typst template, and Typst can’t write PDF form fields. So the template has
a sign-field() box that only records where it landed on the page, and a small
script adds an empty signature field right there with pyhanko sign addfields.
Then sign-pdf.sh finds it by itself.
Be sure to remember one thing: the picture is only a picture. The proof is the cryptographic signature over the whole file. Don’t edit the PDF after signing.
Checking a PDF
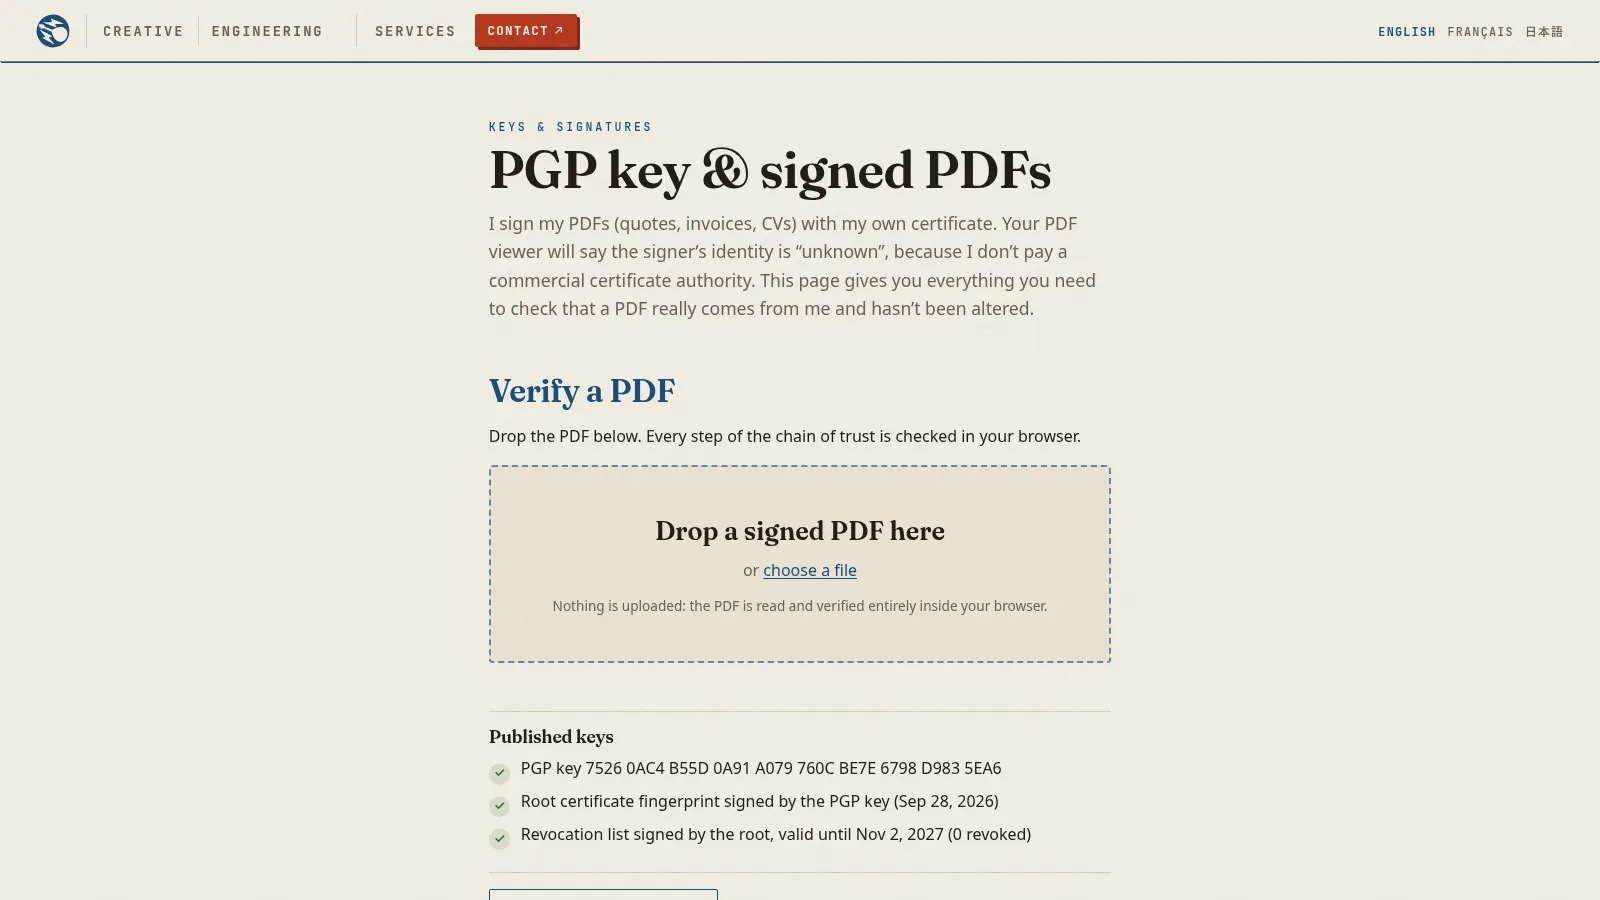
On the /gpg page, you drop the PDF and everything is checked in your browser:
- the signature covers the file and the file wasn’t modified
- the signing certificate chains to my root
- it wasn’t revoked at the time of the timestamp (CRL)
- the timestamp itself is valid
- the root’s fingerprint is signed by my PGP key
- optionally, the PGP key on the page matches the one on keys.openpgp.org and GitHub, so even a hacked website couldn’t fool you
Try it yourself ! No need to wait for one of my quotes: here is a
tiny sample PDF, made with the same Typst template and
signed with sign-pdf.sh. Download it and drop it on the /gpg page,
everything should be green. Then try to cheat: turn the ¥0 total of its fake
quote into ¥1,000,000 with any PDF editor (or just add a comment with your PDF
reader), save, and drop it again. This time the verifier tells you the file was
changed after signing.
There is also a single offline verify.html with my keys built in. And for
people who trust nothing (good for you !), the same checks by hand:
gpg --import eymeric.asc   # check the fingerprint
gpg --verify x509.cert.sha512.asc
gpg --decrypt x509.cert.sha512.asc | sha512sum -c
openssl crl -inform der -in root.crl -out root.crl.pem
openssl verify -CAfile root.cert.pem -CRLfile root.crl.pem -crl_check signing.cert.pem
pyhanko sign validate --pretty-print --trust root.cert.pem document.pdf
When things go wrong
I hope I’ll never need this part, but it’s the reason the chain has so many links:
- Laptop stolen or signing key leaked: in Tails,
bash revoke.sh <serial> keyCompromise(withCOMPROMISED_AT=...if the leak happened earlier), thenpublish.shand push straight away. PDFs timestamped before that stay valid. - Root key leaked: X.509 can’t revoke a root, so my PGP key does it.
revoke-root.shpublishes a PGP-signed notice that the verifier reads. Then a new CA from scratch. - PGP key leaked: everything hangs off it. Out comes the revocation certificate made with the key, then a new key and a new CA.
Conclusion
In the end: three days of commits (27 to 29 September), a few USB sticks, zero
subscription, and every quote or invoice I send now carries a signature anyone
can check. The yearly cost is one Tails session and one publish.sh.
The honest limit stays: Acrobat will keep saying “unknown identity”. You can import my root certificate into your reader’s trusted list, but I don’t expect anybody to do it, that’s why the verification page exists.
What’s next ? The PGP subkeys expire on 24 September 2028, so in two years the primary key has to come out of its hiding place. And I’d like to move the signing key onto a YubiKey (its PIV applet supports RSA-4096 since firmware 5.7), so it can’t even be copied. Stay tuned !